Elevating a homemade dessert to bakery-quality status often seems like a daunting task, reserved for professional pâtissiers with years of experience. But what if we told you that one of the most elegant and impressive cake decorations – delicate chocolate curls – is surprisingly simple to achieve in your own kitchen? These beautiful, ribbon-like adornments add a touch of sophistication and delightful texture to any sweet creation, instantly transforming it from ordinary to extraordinary. This comprehensive guide will demystify the process, providing you with all the knowledge and techniques to craft perfect chocolate curls every time, whether you’re a seasoned baker or just starting your decorating journey.

Why Chocolate Curls Elevate Your Desserts
Chocolate curls are more than just a garnish; they’re a statement. Their elegant, airy form and rich chocolate flavor instantly enhance the visual appeal and textural complexity of any dessert. Imagine a pristine white cake adorned with contrasting dark chocolate ribbons, or a vibrant fruit tart finished with a scattering of delicate white chocolate spirals. Beyond their stunning looks, chocolate curls offer a satisfying, melt-in-your-mouth experience that complements a wide range of flavors without being overly rich or heavy. They lend a professional touch, making your homemade treats look like they came straight from a gourmet patisserie.
Choosing the Best Chocolate for Beautiful Curls
The foundation of perfect chocolate curls lies in selecting the right type of chocolate. Not all chocolates are created equal, and their composition directly impacts how well they curl.
Understanding Chocolate Types
For the best results, you’ll want to use high-quality chocolate with a good percentage of cocoa butter.
- Couverture Chocolate: This is the professional’s choice, known for its high cocoa butter content (typically 32-39%), which makes it flow easily when melted and set with a beautiful shine and snap when tempered. While not strictly necessary, it yields the most pristine curls.
- Good Quality Baking Bars: Brands like Ghirardelli or Baker’s chocolate, often found in the baking aisle, are excellent alternatives. Look for those specifically designed for melting and baking.
- Chocolate Chips: If using chocolate chips, opt for high-quality brands. Some chips contain stabilizers that prevent them from melting as smoothly, which can make curling more challenging.
- Cocoa Butter Content: Aim for dark chocolate with 54-62% cocoa butter, milk chocolate with at least 30% cocoa butter, and white chocolate with at least 28% cocoa butter for smooth, firm curls.
The Role of Tempering (Optional, but Recommended)
Tempering chocolate involves carefully heating and cooling it to stabilize the cocoa butter crystals. While you can make chocolate curls without tempering, a tempered chocolate will result in curls that are much shinier, firmer, and more resistant to melting at room temperature. This means your decorations will hold their shape better and look more professional.
For a quick temper:
- Melt: Gently melt your chocolate over a double boiler or in the microwave.
- Cool & Stir: Remove from heat and stir constantly until the chocolate cools to a specific temperature (e.g., 28°C for dark, milk, and white chocolate).
- Reheat Slightly: Gently reheat to its working temperature (e.g., 31-32°C for dark, 30°C for milk, 29°C for white).
Even if you skip tempering, your curls will still be delicious. They might just appear a bit duller or be more fragile.
Essential Tools for Crafting Your Curls
Having the right tools can make all the difference in achieving elegant chocolate curls with ease. Most of these are common kitchen items you likely already own.
- Baking Sheets or Marble Slab: A sturdy, flat, cold surface is crucial. The back of a large metal baking sheet works perfectly. A marble slab is ideal if you have one, as it stays cool and helps the chocolate set evenly.
- Offset Spatula: This tool is indispensable for spreading the melted chocolate into a thin, even layer. Its angled blade allows for smooth, controlled application.
- Metal Scraper or Bench Scraper: This is the primary tool for creating the curls. A wide, flat metal spatula or a bench scraper (often used by bakers for dough) provides the best leverage and surface area for scraping.
- Parchment Paper: Essential for collecting and handling delicate curls without touching them directly, and for lining storage containers.
- Microwave-Safe Bowl or Double Boiler: For melting your chocolate gently and evenly.
- Vegetable Peeler (Optional): For a quick, simpler method of making curls directly from a chocolate block.
- Kitchen Thermometer (Optional): Useful if you plan to temper your chocolate for optimal results.
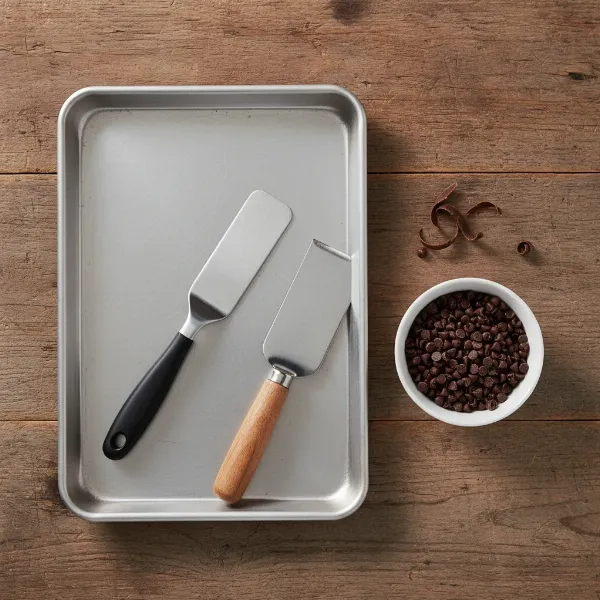 Essential tools for making chocolate curls including a baking sheet, offset spatula, and metal scraper on a wooden surface
The Classic Method: Making Curls from Melted Chocolate
This method yields the most beautiful and substantial chocolate curls, perfect for impressive cake decorating. It requires a bit of precision but is highly rewarding.
Step 1: Melt Your Chocolate
Begin by gently melting your chosen chocolate. You can use one of two common methods:
- Double Boiler: Place your chopped chocolate in a heatproof bowl set over a saucepan of simmering water. Ensure the bottom of the bowl does not touch the water. Stir occasionally until the chocolate is completely smooth and melted.
- Microwave: Place chopped chocolate in a microwave-safe bowl. Heat at 50% power in 30-second intervals, stirring thoroughly after each interval, until the chocolate is melted and smooth. Be careful not to overheat it, as this can cause it to seize.
Step 2: Spread and Cool
Once melted, pour the chocolate onto the clean, inverted back of a baking sheet or a marble slab. Using an offset spatula, spread the chocolate into a very thin, even layer, approximately 2 millimeters (about 1/16 inch) thick. Consistency is key here; a layer too thick will make curling difficult and prone to breaking, while a layer too thin will crumble.
Next, the crucial cooling stage. Place the baking sheet in the refrigerator for about 3-5 minutes, or in the freezer for 2-3 minutes. After this initial chilling, remove the pan and let it rest at room temperature for a minute or two. The goal is for the chocolate to be set but still flexible. When you gently touch it with your finger, it should feel firm but not brittle or fully solid. This delicate balance is what allows the chocolate to curl beautifully.
Step 3: Scrape with Precision
Now comes the fun part! Hold your metal spatula, bench scraper, or knife at a 45-degree angle against the chocolate surface. Apply firm, even pressure and push the scraper forward across the chocolate. As you push, the chocolate should naturally peel away and curl into elegant ribbons.
- Adjusting Angle and Pressure: A flatter angle will generally produce longer, more sweeping curls, while a slightly sharper angle or more pressure might create smaller, tighter spirals or even shavings. Experiment to find your preferred style.
- Patience is Key: It might take a few attempts to find the perfect temperature and pressure. If the chocolate shreds or cracks, it’s likely too cold; let it warm up at room temperature for another minute or two. If it smears or doesn’t hold its curl, it’s too soft and needs to go back into the fridge for 30-60 seconds. Keep testing small sections until you find the sweet spot.
- Utilizing Scraps: Don’t waste the chocolate scraps! Gather them, remelt, and repeat the process to create more curls.
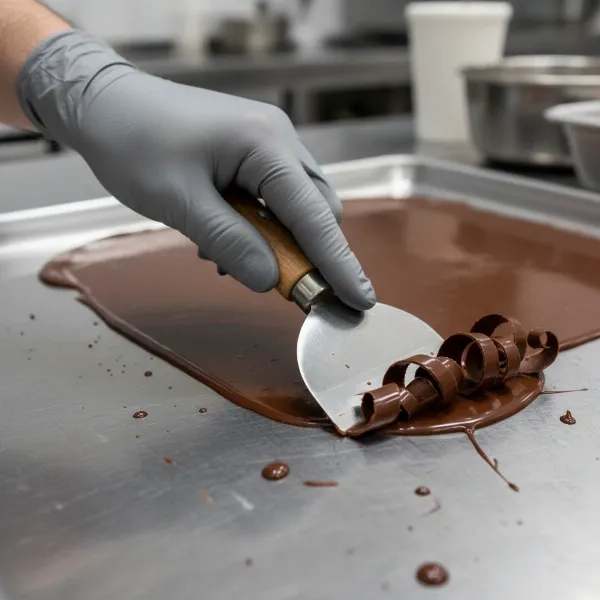 A close-up shot of a metal bench scraper creating delicate chocolate curls on a cooled baking sheet.
The Easy Hack: Chocolate Curls with a Vegetable Peeler
For a quicker, less fuss method, especially if you need smaller, rustic curls or don’t want to deal with melting and spreading, a chocolate block and a vegetable peeler can be your best friend.
Preparing Your Chocolate Block
Start with a room-temperature chocolate bar or block. If it’s too hard, it will simply shave into flakes. To achieve the right consistency, you may need to slightly soften it. Microwave the block for no more than 20 seconds initially on medium power. If it’s still too firm, continue in 5-second intervals. The chocolate should be just soft enough for the peeler to glide through without shattering, but not melted.
Expert Tip: To prevent the heat from your hands from melting the chocolate as you work, hold the chocolate block with a piece of parchment paper or a clean kitchen towel.
Peeling for Perfect Curls
Hold the softened chocolate block firmly over a piece of parchment paper. Gently but firmly scrape a vegetable peeler down a long, smooth side of the chocolate. The peeler blade will carve thin layers of chocolate that naturally curl as they separate from the block. Let these delicate curls fall onto the parchment paper.
This method typically produces smaller, less uniform curls compared to the melted chocolate technique, but it’s incredibly fast and requires minimal cleanup.
Troubleshooting Common Chocolate Curl Problems
Even with the best instructions, chocolate can sometimes be finicky. Here are common issues and how to solve them:
Why Your Curls are Breaking or Cracking (Too Cold)
If your chocolate shatters, flakes, or breaks into tiny pieces instead of forming smooth curls, it’s a clear sign that the chocolate is too cold and rigid.
- Solution: Allow the baking sheet (or chocolate block) to sit at room temperature for another 2-3 minutes. Test a small section again. The slight warming will increase its flexibility.
Why Your Curls are Smearing or Limp (Too Warm)
If your chocolate smears, pulls up limply, or refuses to hold its curled shape, it’s still too warm and soft.
- Solution: Return the baking sheet to the refrigerator for another 30 seconds to 1 minute. You want it firm enough to resist smearing but not so cold that it becomes brittle.
Dull or Streaky Curls
While untempered chocolate will still curl, it often lacks the glossy finish and crisp snap of tempered chocolate.
- Solution: If shine and durability are paramount, consider tempering your chocolate. If not, embrace the rustic charm – they’ll still taste delicious!
Remember, finding the perfect temperature is the most critical factor. It’s often a fine line, so be patient and don’t hesitate to test small areas and adjust the chilling or resting time as needed.
> “The secret to perfect chocolate curls lies in the ‘Goldilocks zone’ – not too hot, not too cold, but just right. It takes a little intuition, but once you find that sweet spot, the magic happens!” – Chef Anna Dubois, Renowned Pastry Artist
Creative Decorating Ideas with Chocolate Curls
Once you’ve mastered the art of making chocolate curls, the possibilities for decorating are endless. They add a sophisticated touch to almost any dessert.
- Cake Sides: Gently press larger curls onto the sides of frosted cakes for a dramatic, textured finish.
- Cupcake Toppers: Pile a generous amount of curls on top of frosted cupcakes for an elegant upgrade.
- Dessert Garnishes: Sprinkle them over mousses, trifles, puddings, ice cream sundaes, or even hot chocolate.
- Pie and Tart Embellishments: A scattering of curls can beautifully frame a fruit tart or add richness to a chocolate pie.
- Mixed Textures: Combine chocolate curls with fresh berries, a dusting of cocoa powder, or a drizzle of caramel for a multi-sensory experience.
Storing and Handling Your Delicate Chocolate Curls
Chocolate curls are beautiful but delicate. Proper storage and handling are essential to keep them looking their best.
- Gentle Handling: Avoid touching the curls directly with your warm hands as much as possible, as they will melt and lose their shape. Use a small offset spatula or tweezers to transfer them.
- Storage Container: Once formed, carefully transfer your chocolate curls onto a piece of parchment paper and then into an airtight container.
- Temperature: In cool environments, chocolate curls can be stored at room temperature for several weeks. However, if your kitchen is warm or humid, it’s best to store them in the refrigerator or even the freezer to prevent them from melting and sticking together. If refrigerated, let them come to near room temperature for a few minutes before decorating to prevent condensation.
Conclusion
Creating elegant chocolate curls for your cakes and desserts is a skill that looks far more complicated than it actually is. With the right quality chocolate, a few simple tools, and a keen eye for temperature, you can transform ordinary sweets into extraordinary culinary masterpieces. Whether you opt for the classic melted chocolate method for sweeping ribbons or the quick vegetable peeler hack for charming smaller curls, the satisfaction of garnishing your creations with these homemade beauties is truly unmatched. So, go ahead, gather your ingredients, and dare to elevate your next dessert. Which method will you try first to add that professional touch to your baking?
Frequently Asked Questions
What kind of chocolate is best for making chocolate curls?
High-quality baking chocolate with sufficient cocoa butter is ideal. Look for dark chocolate with 54-62% cocoa butter, milk chocolate with at least 30%, or white chocolate with at least 28%. Baking bars work well, and high-quality chocolate chips can also be used.
Do I need to temper chocolate for curls?
Tempering is not strictly required, but it is highly recommended. Tempered chocolate produces curls that are shinier, firmer, and more stable at room temperature, making them less prone to melting and holding their shape better. Untempered curls will still taste good but may appear duller and be more fragile.
How can I stop my chocolate curls from breaking?
If your chocolate curls are breaking or shattering, it means the chocolate is too cold. Remove the baking sheet from the fridge or freezer and let it sit at room temperature for a minute or two until it becomes slightly more flexible. Test a small area before continuing.
How do I store chocolate curls?
Store chocolate curls in an airtight container, preferably layered with parchment paper, to prevent them from sticking together. In cool environments, they can be kept at room temperature for several weeks. In warmer or humid conditions, refrigerate or freeze them to maintain their shape and prevent melting.
Can I make chocolate curls without special tools?
Yes, you can. For the melted chocolate method, you’ll need a baking sheet and a wide metal spatula or knife. For a simpler alternative, you can use a room-temperature chocolate bar and a regular vegetable peeler to scrape off smaller curls.
What’s the ideal thickness for spreading melted chocolate?
For the melted chocolate method, spread the chocolate into a thin, even layer, ideally around 2 millimeters (about 1/16 inch) thick. A layer that is too thick will make it difficult to curl, while a layer that is too thin might crumble instead of forming ribbons.